
I learned this the hard way: when a crisis hits, your pet can’t follow your instructions unless you’ve already made the plan. In 2026, people are more prepared for their own emergencies than for their animals—and that gap is exactly where injuries and losses happen.
This guide is your emergency preparedness for pets home checklist. You’ll set up a first aid kit, organize meds, and build an evacuation plan you can use under stress.
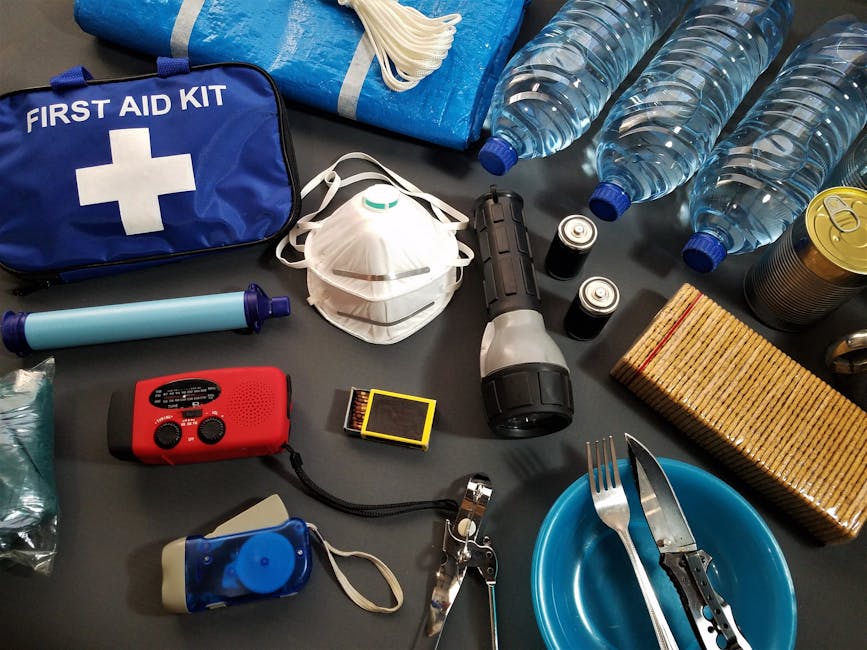
Emergency preparedness for pets starts with a “grab-and-go” mindset
Your goal is to move fast with what you already have. In many disasters, roads close, phones die, and time disappears. So the checklist focuses on items that are easy to carry and easy to explain to others.
In my own home, we keep one bag by the front door and one in the hallway closet. The “front door bag” is for instant use. The closet bag is for backup supplies. That split sounds small, but it matters when you’re rushing out.
Quick definition: An evacuation plan is a written plan that shows where you’ll go, who you’ll call, and what you’ll take. A “go bag” is the bag you can grab in seconds.
What most people get wrong about pet emergency plans
Most people think they’ll remember everything. Then stress hits, and even simple things become hard. Here are the big mistakes I see again and again:
- No carrier ready: A pet carrier stuffed with blankets is not a carrier. You need a setup that’s ready to go in under 30 seconds.
- Medications stored “somewhere”: If meds are in a drawer you never open, you’ll lose time. Everything important should be in one place.
- Pet medical info not easy to find: If you can’t find your pet’s vet name, allergies, and dosage fast, emergency care gets slower.
- No plan for leash and harness backup: When one fails, you need another.
Fixing these takes one weekend. After that, it’s mostly “restocking and checking.”
Pet first aid kit checklist (home-ready, not perfect)
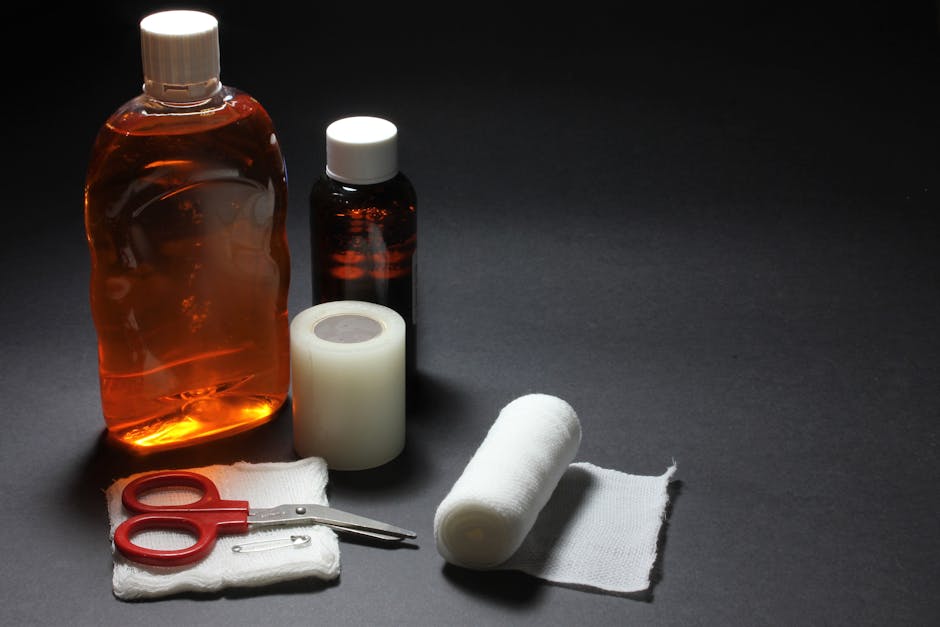
A good pet first aid kit is practical, not fancy. You’re not trying to do surgery. You’re trying to stop bleeding, keep your pet calm, and buy time until you reach a vet or emergency clinic.
As of 2026, the best kits are the ones you can actually use. That means clear labels, common supplies, and sizes that fit your dog or cat.
Core supplies you should include
Use this list as your baseline. Keep it in a hard-sided container or a zipper tote with compartments.
- Gauze pads (non-stick): Multiple sizes. Non-stick matters because pulling gauze off fur can hurt.
- Bandage wrap: A stretchy wrap for holding gauze in place.
- Self-adhesive bandage tape: Useful for securing without needing extra clips.
- Pet-safe antiseptic: Choose one that’s made for wounds (follow label directions). Avoid random household chemicals.
- Saline (sterile wound wash): Helps rinse dirt without burning.
- Stiptic powder (or styptic pencil): For small nail and paw bleeding. (Ask your vet if you’re unsure.)
- Digital thermometer: For basic temperature checks. You’ll still need vet help, but it helps with urgency.
- Tweezers (fine tip): For removing small splinters—only if you can see them clearly.
- Scissors: Small, blunt-tip if you have kids around.
- Reusable cold pack: Or instant cold pack that you can wrap. Don’t put ice directly on skin.
- Important contact card: Includes your vet, after-hours clinic, poison control number, and local emergency hospital.
- Pet muzzle (only if safe for your pet): Stress can make even gentle pets snap. If you can’t muzzle your pet safely, skip this and focus on barriers/carriers.
Bandage size tip that saves time
One mistake I made years ago: I bought one bandage size for all pets. It was the wrong width for my dog’s leg and too big for my cat. Now I keep two widths (one narrow, one medium) and add extra gauze. It’s cheaper than replacing a whole kit after you realize nothing fits.
First aid for common situations (simple, step-by-step)
Here are quick actions you can use. If your pet is having trouble breathing, is unconscious, or bleeding heavily, skip “waiting and watching.” Go get help.
1) Bleeding
Apply gentle pressure with clean gauze for 5–10 minutes without lifting to check constantly. If blood soaks through, add more layers on top. Keep your pet warm and still.
2) Suspected sprain or fracture
Don’t force movement. If you need to transport, keep the area still using light bandaging around the injury—only to provide support, not tight tightening. If it looks like a bone is out of place, don’t try to “fix” it.
3) Burns and scalds
Cool the area with cool (not freezing) water for several minutes. Then cover loosely with a clean non-stick pad. Avoid greasy home remedies.
4) Choking or breathing trouble
If your pet can’t breathe, get to emergency care right away. If you can see an object in the mouth, you may remove it carefully if it’s reachable and clear. Don’t do deep “fishing” with your fingers.
5) Seizure
Remove nearby hazards, dim bright light if possible, and time the seizure. Don’t hold your pet down. After the seizure ends, keep them safe and contact your vet. Seizures can return quickly, and many pets need urgent meds.
Pet meds organization: make dosing easy when you’re stressed
Medications should be stored and labeled so you can grab them without thinking. In emergencies, you may be shaking, and your memory won’t work the way it does in calm moments.
For every pet medication, create a mini “meds card” and keep the meds in one labeled container.
Medication system that works in real life
Here’s the setup I recommend for emergency preparedness for pets at home. It takes time once, then it saves you later.
- One clear bin per pet: Label it “Meds – [Pet Name]” with their photo on the lid.
- Sort by day: If you dose twice daily, consider marking “AM/PM” sections with a label.
- Include a dosing sheet: Write the medication name, strength, dose amount, and schedule.
- Keep the original bottle when possible: It helps emergency clinics confirm exact strength.
- Add a buffer: If you can, keep at least 7–14 days of key meds during hurricane or wildfire season in your area. If you can’t, still keep one “emergency” week in the bin.
Original insight: I don’t just store pills. I store “proof of the dose.” That means the dosing sheet plus the bottle label. When a vet tech asks, you can answer fast. Fast answers can mean faster treatment.
What about liquid meds, inhalers, and special items?
Liquid meds are easy to mess up when the label gets smudged. Use a waterproof label and keep the bottle upright in a small zip bag.
For inhalers or asthma meds, include the spacer, mask, or attachments. Many pet owners forget these pieces because they live in a different drawer than the medicine.
If your pet has an EpiPen or similar emergency device, check expiration dates and where it’s stored. Put that device in the same go bag as the meds.
Don’t forget non-prescription items that matter
Some “small” items turn into lifesavers during evacuation.
- Diphenhydramine (Benadryl) if your vet has okayed it: Dosage depends on your pet’s weight and condition. Only use if your vet gave you guidance.
- Saline eye wash: Useful for dust exposure or minor irritation.
- Wound rinse: Sterile saline beats home mixes.
- Tick removal tools: If your area has ticks, include a tick hook or fine tweezers.
Important: Never guess medication doses. If you don’t have vet-approved instructions, leave the medication out of your “emergency take-along” unless you’re sure it’s safe.
Evacuation plans for dogs and cats: carriers, routes, and “who calls the vet”
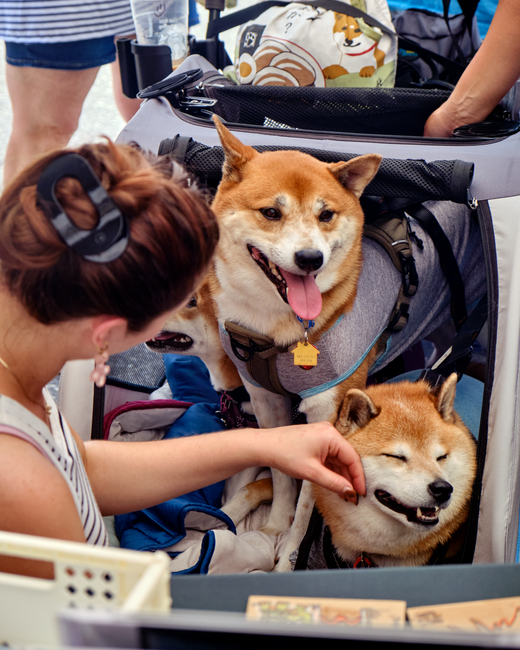
Evacuation planning is where most pet owners run into trouble. The pet plan can’t be “we’ll figure it out when we go.” You need a clear route, a backup option, and a plan for where your pet will stay.
Build a two-location plan (primary + backup)
Choose a primary place to go and a backup place. In 2026, many shelters and hotels still have rules that change fast, so having two options keeps you from getting stuck.
- Primary option: A friend or relative outside the danger zone, or a pet-friendly hotel you’ve already checked.
- Backup option: A different person or a kennel that accepts emergency boarding.
Write the address and phone number on a card in your go bag. Also store it in your phone, but don’t rely on data working.
Carriers and leashes: make them “ready,” not “available”
This is one of my favorite emergency preparedness for pets upgrades because it reduces panic. Keep at least one carrier open, with a familiar blanket inside, in a spot you can reach fast.
- Dogs: Use a harness + leash you trust. Keep a second leash in the go bag.
- Cats: Keep a sturdy carrier with a door you can open quickly. Add an absorbent pad if your cat gets nervous and pees when stressed.
If your cat hates the carrier, practice gentle carrier time now. Do 2–5 minute sessions. Make it boring. Reward your cat when they go inside willingly.
Crucial documents to pack every time
Even if you’ve packed your life jacket, you still need your ID. Pets need their own version.
- Vaccination records (current year when possible)
- Medical records summary from your vet (diagnoses + meds list)
- Proof of microchip registration
- Photo of your pet (same day as updates if you can)
- Emergency contact list (vet, clinic, trusted friend)
Use a waterproof folder. I like a zip folder that fits in the go bag pocket so I’m not digging through the bin.
Emergency preparedness for pets checklist: print-and-fill home plan
Here’s a full checklist you can copy. Fill it in and keep it visible. I’m going to be direct: if it isn’t written down, it doesn’t exist when you need it most.
Home go-bag checklist (dogs & cats)
- Carrier or crate (already set up, easy to grab)
- Leash + harness (and backup leash)
- Food for 3–5 days (measured portions)
- Water plan (collapsible bowl + bottles or a plan to access water)
- Medications in a labeled bin (7–14 day buffer if possible)
- First aid kit (gauze, wrap, saline, antiseptic, thermometer)
- Waste bags and gloves if you’re in shelters
- Absorbent pads for nervous cats or seniors
- Extra towel (drying off, wrapping, comfort)
- Microchip info (printed and on phone)
- Vet contact card (after-hours number included)
At-home checklist you should do monthly
If you only check your kit once a year, you’re behind. Every month, do a 10-minute reset.
- Check expiration dates on antiseptic and any packaged items
- Confirm meds bin has the right quantities
- Replace anything that’s been used
- Test the go-bag: can you grab it in under 30 seconds from where it sits?
- Update the contact card if your vet or phone numbers changed
Time-based checklist: what to do right now
Use this timeline if you want a clear plan rather than “someday.”
- Today: Pick the go-bag location and label it “PETS EMERGENCY.” Print the vet contact card.
- This weekend: Build the first aid kit and meds bin system for each pet.
- Next 2 weeks: Practice carrier loading or leash handling once so your pet is calmer.
- By the end of the month: Confirm your primary and backup evacuation locations allow pets during emergencies.
People Also Ask: pet emergency planning questions answered
What should be in an emergency kit for pets?
An emergency kit for pets should include a carrier or crate, leash/harness (plus a backup), at least 3–5 days of food, water plan supplies, medication bin, first aid supplies (gauze, wrap, saline), and a printed card with your vet and clinic contacts. Add documents like vaccine records and microchip info in a waterproof folder.
How many days of pet food should I keep for evacuation?
I recommend 3–5 days as a practical baseline for most households. If you live in an area with frequent wildfire or hurricane warnings, push toward 7 days when you can, especially for pets on prescription diets.
Where should I store pet medications for emergencies?
Store them in one labeled bin per pet inside your go bag or near the go bag. Keep medications in their original labeled containers, plus a dosing sheet that lists strength and schedule. This helps emergency vets confirm the exact dose fast.
Can I bring my pet to a shelter during a disaster?
Sometimes, but rules can change quickly. Some shelters accept pets with restrictions, while others refer people to partner facilities. Your best move is to contact the shelter or local animal services now and ask what they do during evacuations. Keep the answer in your contact card.
What if my pet has a chronic condition (allergies, seizures, diabetes)?
Build a “chronic condition page” for your pet that explains the diagnosis and the emergency plan your vet provided. For diabetes, include insulin, syringes/pens, and extra supplies for testing if your vet recommended it. For seizures, include the exact rescue med instructions your vet gave you.
Training and comfort: calm pets handle emergencies better
Emergency readiness isn’t only supplies—it’s behavior. When a pet is used to the carrier or harness, they move easier and stress drops for everyone.
If you already follow your pet training routines, you’ll notice the same skills show up in emergencies: practice, consistency, and positive rewards.
For more on training that helps in real life, you might like our post on carrier desensitization for pets and our guide to leash handling for beginners. (Those are great for making evacuation day less scary.)
One simple practice routine (10 minutes)
- Day 1–3: Place treats near the carrier, door open, let your pet choose to enter.
- Day 4–6: Encourage entry and briefly close the door for 3–5 seconds.
- Day 7–10: Increase door-closed time to 20–30 seconds and reward after opening.
Stop if your pet panics. You can still make progress by slowing down the steps.
Tools and products that can help (without going overboard)
You don’t need a giant store of gear. But a few items make real differences because they solve common problems like water, identification, and transport.
Practical add-ons I like for 2026
| Item | What it helps with | Pros | Watch-outs |
|---|---|---|---|
| Collapsible pet bowl | Eating and water in shelters | Light and packable | Rinse after use so it doesn’t smell |
| Reflective harness or vest | Visibility at night | Helps people spot your pet | Don’t buy one that doesn’t fit well |
| Absorbent pads | Accidents during stress | Keeps carriers cleaner | Change quickly so your pet stays comfortable |
| Water bottles or insulated travel bottle | Water access during travel | Reduces dehydration risk | Plan how you’ll refill |
Identification upgrades: microchips + tags + photos
Microchips are a big help because they don’t fall off. But tags and photos matter too. If your pet gets separated, a tag helps the first person who sees them. A photo helps shelters match your pet faster.
Make sure your microchip registration has current phone numbers. People often update their address but forget the chip contact details.
When to call a vet (and when to go immediately)
In emergencies, speed matters more than guessing. If your pet is bleeding heavily, can’t breathe, is unresponsive, or has a seizure lasting more than a few minutes, go straight to emergency care.
Call the vet for guidance when you have time and your pet is stable. When you’re unsure, it’s okay to call while you’re loading your pet into the car.
One limitation: this checklist is not a substitute for veterinary advice. Your pet’s medical needs differ based on breed, age, and health conditions. Use this as your home plan, then fine-tune with your vet.
Conclusion: make your emergency preparedness for pets plan visible and usable
Emergency preparedness for pets works when it’s simple, labeled, and ready to grab. Put your first aid kit and meds bin in one go-bag system, set up carriers and leashes for fast travel, and write down your evacuation locations and vet contacts.
Your takeaway for today: choose your go-bag spot, print the pet contact card, and build your meds bin with a dosing sheet. After that, do a quick monthly check so the plan stays ready in 2026—not just on paper.
Featured image alt text suggestion: Emergency preparedness for pets home checklist with first aid kit, pet meds bin, and evacuation documents laid out.