

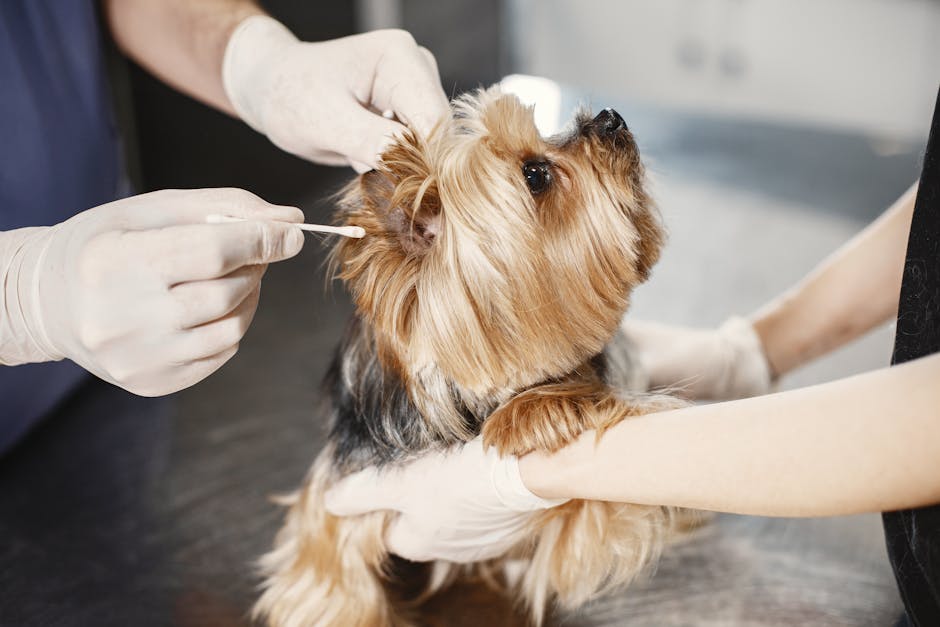
If you’ve ever seen your dog shake their head right after a bath, you already know ears can get messy fast. The surprise? Ear cleaning isn’t about “scrubbing.” It’s about gently removing wax and debris so air and skin can stay healthy.
This complete guide to pet ear cleaning walks you through what to do at home, how often to clean, what products to choose, and exactly what infection signs look like. I’ll also tell you when home care stops and you should call a vet.
Pet Ear Cleaning Basics (What “Clean” Really Means)
Pet ear cleaning is a simple, gentle process—not a deep “sterilizing.” Ear wax is normal, and most pets don’t need their ears wiped like you’d clean a countertop.
In plain terms, ear cleaning refers to removing extra dirt, loose wax, and debris from the outer ear flap (pinna) and the ear canal entrance. The ear canal itself is delicate, so you should never force anything deep inside unless your vet shows you how.
As of 2026, best practice is safer and simpler: use a pet-safe ear cleaner, keep the procedure short, and stop if your pet shows pain, strong odor, or bleeding.
Which pets need ear cleaning more often?
Some pets are more prone to ear buildup. Breeds with floppy ears (like Cocker Spaniels) trap moisture and air, and pets with allergies often get more inflammation in the ear canal.
You’ll also see more ear wax if your pet has lots of hair inside the ear, swims often, or gets frequent water in the ears. If your pet is prone to ear trouble, you may clean more regularly, but you still want to keep it gentle.
How Often Should You Clean Your Pet’s Ears?
The right schedule depends on what you see, not what a calendar says. A good goal is to check once a week and clean only when there’s visible buildup or smell.
Here’s a simple guide I use when I’m helping friends with home care:
- Healthy ears with little wax: check weekly, clean every 2–4 weeks if needed.
- Light wax or occasional odor: check weekly, clean about 1x every 1–2 weeks.
- Frequent buildup or known ear issues: your vet may recommend a specific plan. Don’t guess—ear infections often need treatment, not just cleaning.
If your pet starts shaking their head, scratching hard, or the ear looks red after you clean, that’s a sign you may be cleaning too often or too aggressively.
What most people get wrong
The biggest mistake is using cotton swabs deep in the ear canal. Even when you think you’re being careful, swabs can push wax deeper or irritate skin, which can make infection more likely.
Another common mistake: using human products. Alcohol, hydrogen peroxide, and strong oils can burn or dry ear skin. Your pet’s ear canal needs a gentle, pet-safe cleaner.
What You Need for Safe Pet Ear Cleaning
Gathering the right tools makes the whole job easier and safer. I like to set up everything before I touch my pet, because some pets will try to move once they feel the ear area.
Safe supplies to use
- Pet ear cleaner made for dogs or cats (examples: Zymox Otic Solution, Virbac Epi-Otic Advanced, or veterinarian-recommended products). If you’re not sure which one fits your pet, ask your vet.
- Clean cotton balls or soft gauze for wiping the outer ear. Avoid using the same cotton ball twice.
- Treats for positive reinforcement. I use small bites so my pet stays calm.
- Towels if your pet gets squirmy.
- Flashlight (or phone light) to check what’s actually in there.
What to avoid
- Cotton swabs (Q-tips) in the canal. You can use them only for the outer ear if your vet says it’s okay, but I generally stick to cotton balls/gauze.
- Water from the sink unless your vet specifically told you to rinse. Too much water can worsen problems.
- Human ear drops unless prescribed for your pet.
- Forcing fluid if your pet pulls away hard or acts in pain.
A quick note about cats vs. dogs
Cats usually tolerate ear cleaning better when you keep it short and calm. Dogs may shake or scratch more. If your cat gets stressed, do shorter sessions and consider asking your vet for a home-care plan.
For both pets, don’t clean aggressively. Mild redness after a first try can happen, but strong redness or pain is not normal.
Step-by-Step: Pet Ear Cleaning You Can Do at Home
Here’s the step-by-step method I use for gentle ear cleaning at home. Plan for about 5–10 minutes the first time, and aim for a calm, steady pace.
Step 1: Choose a calm moment
Do it when your pet is relaxed. After a walk, after play, or after a meal is often best.
Turn on a light, grab treats, and hold your pet in a comfortable position. If you have a second person, ask them to help keep your pet still without pinching.
Step 2: Inspect the ear first (don’t clean yet)
Look at the ear flap and the entrance to the canal. You’re checking for these clues:
- Color: mild buildup is usually tan or brown. Bright red or swollen skin is a warning sign.
- Smell: strong “yeasty,” sour, or rotten odors can mean infection.
- Discharge: yellow, green, bloody, or pus-like fluid is not a home-cleaning situation.
- Texture: dry flakes can be irritation; thick, wet material can be infection.
If you see bleeding, obvious swelling, or your pet cries when you touch the ear, skip cleaning and call your vet.
Step 3: Clean the outer ear
Use a cotton ball or gauze slightly dampened with ear cleaner. Wipe only the outer areas you can see clearly.
Think of it like cleaning the outside of a wrist, not digging into the bones. Keep wiping gentle, removing what’s loose.
Step 4: Apply ear cleaner to the ear canal entrance
Follow the bottle directions for how many drops to use. Usually it’s a small amount, and you’ll see fluid spread in the ear canal entrance.
After you add the drops, gently massage the base of the ear for about 20–30 seconds. This helps break up wax and debris.
Important: If your pet acts like it’s hurting, stop right away.
Step 5: Let your pet shake it out (then wipe)
Many pets shake after the massage. Let them do a quick shake, then use a cotton ball/gauze to wipe away loosened debris from the parts you can see.
Don’t push tools deeper. If the debris won’t come out, that’s a clue it may need medication or a different approach.
Step 6: Keep it dry and finish with praise
Once the ear looks cleaner, reward your pet and stop. No “extra” cleaning needed after the first pass.
If your pet still has visible wax, wait and check again later instead of repeating the same forceful steps in one day.
Pet Ear Cleaning for Different Problems (Wax vs. Yeast vs. Water)
Not all “dirty ears” are the same, and the home approach changes. Here’s how I sort common issues based on what I see.
Heavy wax buildup
If the ear has thick, dry-to-mud-like wax without strong odor, gentle ear cleaner and wipe-down usually helps. Clean no more than once per day for a couple days, then reassess.
If the wax keeps returning fast (like within a week) or your pet keeps scratching, that’s a vet clue. Underlying allergies or ear inflammation often drive the problem.
Yeast smell or dark, greasy debris
Yeast issues often smell “musty” and can leave dark debris. In my experience, cleaning helps only temporarily when yeast is active.
If you notice yeast-like odor plus redness or discharge, a vet visit usually gets you faster relief because treatment may include medicated drops.
After swimming or bath water
If your pet gets water in the ears, it can lead to irritation. Dry the outer ear gently with a towel, and avoid deep cleaning right away.
After 12–24 hours, you can check the outer ear and entrance. If there’s persistent odor, pain, or discharge, don’t keep trying—get help.
Signs of Ear Infection: When Cleaning Is Not Enough
Ear infection signs show up fast, and the earlier you act, the better your pet feels. Cleaning helps remove debris, but infection needs proper treatment.
Here are clear signs of infection to watch for:
- Bad smell (sour, yeasty, or rotten)
- Redness or swelling of the ear flap or canal entrance
- Discharge (yellow/green fluid, pus, or bloody material)
- Head shaking or frequent ear scratching
- Pain when you touch the ear
- Loss of balance or head tilt
- Thick debris that keeps coming back quickly
Infections can also spread deeper, so “I cleaned it and it looks better” doesn’t always mean it’s fixed. If symptoms return within days, call your vet.
Allergies and ear infections go together
Many pets get ear issues because of allergies. Food allergies, environmental allergies, and even repeated moisture can keep ear skin inflamed.
That’s why I don’t treat “ear cleaning” like a one-and-done chore. When ears keep acting up, you need to find the cause. This connects to at-home daily allergy management ideas we cover in another post.
When to Call a Vet (Exact Timing)
Here’s the rule I follow: if your pet’s ears look or act worse after you clean, or if you see infection signs, it’s vet time.
Call the vet today if you notice any of these
- Bleeding from the ear
- Visible pus or wet, thick discharge
- Severe pain, crying, or your pet jerks away when you touch
- Head tilt, wobbling, or loss of balance
- Ear canal looks very swollen
Call within 24–48 hours if
- There’s a strong odor after cleaning
- Scratching and shaking keep going for more than a day
- The debris keeps returning quickly (within a week)
Why you shouldn’t wait
Ears can get worse faster than people expect. Deep infections can cause pain, and they can also lead to thickening of ear tissues.
As a practical example, I once saw a pet improve briefly after home cleaning, then flare again two days later with a stronger odor. The vet found that medication was needed because the issue was deeper than wax.
People Also Ask: Pet Ear Cleaning Questions
Can I clean my pet’s ears every day?
You can clean lightly more often if your vet recommends it and your pet tolerates it. But daily deep cleaning is usually not a good idea.
Ear skin gets irritated easily. If you feel like you need daily cleaning to keep your pet comfortable, that often means there’s an underlying problem.
What’s the safest way to clean a dog’s ears?
The safest method is to use a vet-approved ear cleaner, wipe only what you can see, and avoid cotton swabs in the canal. Massage the base gently for 20–30 seconds, wipe debris out, then stop.
If your dog resists or seems painful, don’t keep forcing it. Use the next section’s tips for training and comfort instead.
How do I clean my cat’s ears without stressing them?
Keep sessions short and reward often. Start by letting your cat touch the ear area while you give treats, then build up to wiping the outer ear only.
On the first few tries, skip the drop-and-massage step. If your cat doesn’t tolerate it after practice, ask your vet about a calmer approach or prescription options.
Do ear infections smell bad?
Often, yes. Many infections have a noticeable odor because of yeast or bacteria. Still, not every ear infection smells strong, so don’t use smell alone.
Look at the whole picture: redness, discharge, pain, and ongoing shaking.
Make Ear Cleaning Easier: Simple Training That Works
Ear cleaning goes smoother when you treat it like a training session, not a battle. I’ve seen this help a lot, especially for dogs that start to tense up the moment you grab the towel.
Try a 5-day practice plan
- Day 1: reward for calm near the ear. No touching.
- Day 2: touch the outer ear flap for one second, then treat.
- Day 3: touch plus wipe the outer edge with gauze.
- Day 4: wipe outer ear and place a few drops only if your pet stays calm.
- Day 5: repeat, but stop while your pet is still relaxed.
Keep each session under 2 minutes. Ending early teaches your pet that “ear time” ends on your terms, not when it becomes stressful.
Should I use restraint tools?
Sometimes people reach for a muzzle or restraint to force the issue. I’m not against safety gear, but I am against using tools to power through pain or infection signs.
If your pet is in obvious pain, restraint won’t fix it—you need a vet exam. For routine cleaning, gentle handling and training usually beats force.
Product and Tool Comparison: What’s Worth It?
You don’t need fancy gadgets. Still, using the right tools makes cleaning safer and more comfortable.
| Item | Good for | Watch out for |
|---|---|---|
| Pet ear cleaner | Breaking up wax and loosening debris | Choose pet-safe products; avoid human alcohol/peroxide |
| Cotton balls or gauze | Wiping outer ear and visible debris | Don’t rub hard; replace often |
| Flashlight/phone light | Quick inspection before cleaning | Use a gentle beam; don’t shine too close |
| Q-tips/Cotton swabs | Limited use on outer edges only | Never push deep into the canal |
Cost and Vet Visit: What to Expect in Real Life
Home cleaning is cheaper, but it’s not the right answer when there’s infection. In 2026, many vet visits for ear problems include an exam and sometimes a test of ear debris under a microscope.
Cost varies by area, but a common pattern is: exam fee first, then treatment plan based on what they find (like bacteria, yeast, or parasites). If you keep cleaning at home while symptoms worsen, costs usually go up later because the infection deepens.
If you want a heads-up on handling everyday pet needs, our site also has practical posts like safe at-home pet grooming routines that pair well with ear care.
Conclusion: Your Ear Cleaning Takeaway for 2026
Pet ear cleaning works best when it’s gentle, short, and based on what you actually see. Check weekly, wipe only the outer parts you can reach, use a pet-safe ear cleaner, and massage briefly—then stop.
If there’s a bad smell, discharge, strong redness, pain, or your pet keeps scratching after cleaning, don’t keep trying at home. Call your vet so you can treat the real cause and get your pet back to feeling normal.
Featured image alt text (for your CMS): Pet ear cleaning with pet-safe ear cleaner and gauze, showing safe wiping of the ear canal entrance