


Here’s a quick truth that surprised me the first time I did it the “hard way”: the best potty-training method isn’t the one that sounds easiest. It’s the one that matches your pet’s body, habits, and daily schedule. If you pick wrong, you can end up with months of frustration and a home that never feels clean.
In this guide, I’ll compare crate training vs. paper training vs. litter training for common pets. You’ll get practical steps, real-world timelines I’ve seen work in 2026, and a simple way to choose the right plan for your situation.
Quick answer: which training type fits which pet?
Crate training is best for dogs and some puppies when you want reliable house training with a clear routine. Paper training fits small indoor pets like puppies (short-term), sick/injured dogs, or some small animals that need a wipe-clean spot. Litter training is for cats (and some small pets like ferrets or rabbits, depending on the setup).
Still, the details matter. Even the “right” method can fail if you skip schedule, clean correctly, or move too fast.
What each method really means (plain English)
Each method is about one thing: teaching your pet where it’s okay to go. The difference is how you block bad choices and how you guide good ones.
Crate training is safe space + timing
Crate training is a method where your dog learns to hold it and relax in a crate that feels like a den. A crate is not a punishment box. It’s a home base that helps prevent accidents while you teach timing.
Definition-style note: Crate training refers to using a crate as a management tool while you teach your pet when and where to eliminate.
Paper training is a “practice potty spot”
Paper training uses pads, newspaper, or a washable training mat placed in a specific area. Your pet learns that elimination on the right surface earns quick cleaning and calm handling.
In my experience, paper training works best when you treat it like a “training schedule,” not like a place your pet can use freely all day.
Litter training is a scent + texture habit
Litter training uses a litter box (with the right litter texture and depth) to encourage natural digging and digging-to-bury behavior. Cats often get the idea quickly because it matches what they already do in the wild.
Litter training refers to teaching a cat to eliminate in a litter box by offering the right setup and keeping it clean.
Crate training vs paper training vs litter training: the practical comparison
This table shows the key differences people care about: who it’s for, daily effort, typical time to see results, and common failure points.
| Method | Best for | Typical “early wins” timeline | Daily effort | Biggest mistake |
|---|---|---|---|---|
| Crate training | Dogs & puppies | 3–10 days (fewer accidents) | Medium (schedule + trips) | Using the crate as punishment or leaving too long |
| Paper training | Some small pets, puppies short-term, indoor-only plans | 5–14 days (clear spot choice) | Medium-high (pad changes + cleanup) | Changing pad types constantly or ignoring timing |
| Litter training | Cats (also some small animals) | 1–7 days (box use) | Low-medium (scooping + litter depth) | Dirty box, wrong litter texture, or one box for two cats |
One original insight I’ve learned the hard way: most training “failures” are actually cleaning failures. If you don’t remove the smell in the right way, your pet thinks that spot is still “allowed,” no matter what the trainer says.
Crate training: step-by-step for dogs (and common 2026 best practice)

Crate training works when you treat it like a schedule system. If you only use the crate when you remember, your dog will still guess when it’s safe to go.
Step 1: pick the right crate size
Your dog should be able to stand up, turn around, and lie down comfortably. If it’s too big, they can pee in one corner and sleep in the other. That ruins the whole “hold it in the den” idea.
For sizing, I usually aim for a crate that gives only enough room for movement, not extra space.
Step 2: use short crate sessions (age matters)
A common rule I follow in real life: puppies can usually hold it about 1 hour per month of age plus a little buffer. So a 3-month-old may need bathroom trips about every 3–4 hours during the day.
At night, even good puppies need a set plan. Many families end up doing a 1–2 AM check for the first couple weeks.
Step 3: add a “go outside” cue
Pick one phrase like “go potty” and use it every time. Walk your dog to the same outdoor spot so they learn the routine through repetition.
When they finish, praise and reward right away. Dogs learn fast when you time it right.
Step 4: manage instead of hoping
While training, watch for signals: sniffing, circling, sudden restlessness, or “zoomies.” If you see it, interrupt calmly and go outside.
If you can’t watch every second, use the crate or a small pen. That’s not “being strict.” It’s being fair.
What most people get wrong about crate training
- Crating for too long: accidents teach the dog that the crate area is acceptable.
- Wrong mindset: a crate should never be used for punishment.
- Not cleaning correctly: old urine smell can keep the habit going.
- Switching routines: a new door, a new walking route, or a new yard spot can slow progress.
If you want more help with routines, you might also like our post on house training basics for new dog owners (timing, schedules, and what to do when your puppy regresses).
Paper training: a practical plan for indoor potty spots
Paper training works best when you keep the “training area” consistent. If you move the pad daily or switch brands constantly, you make it harder for your pet to learn.
Step 1: choose the right surface (and don’t change it fast)
Pick one type of pad or mat and stick with it for at least 1–2 weeks. Many pets learn by feel and smell, not by “understanding” your goal.
In 2026, I often see families use washable training mats with a tray base because they handle daily cleanup well. If you go that route, keep the mat dry between uses so it doesn’t stink.
Step 2: place it where the pet already wants to go
Start with the area your pet naturally chooses. Then slowly guide them closer to the real target spot. A good trick is to place the pad near where your pet hangs out (like a play pen corner), then move it a little over time.
Don’t place it right next to food and water. Most animals avoid soiling near eating.
Step 3: use a “small area + supervision” setup
Paper training goes better in a limited space. Use a playpen, baby gate, or a small room. That way you can catch the moment before accidents happen.
If you’re dealing with a puppy, expect frequent checks. Paper training is not “set it and forget it.”
Step 4: timing beats size
Paper training is about catching the right moment. Take your pet to the pad after sleep, after meals, after play, and every 1–2 hours during the day (more often for very young pets).
When they use it, reward with praise or a small treat. Keep it simple.
What people get wrong with paper training
- Waiting too long to clean: smell builds fast, especially on floors.
- Leaving pads everywhere: it turns training into guesswork.
- Using scented pads for a sensitive nose: fragrance can confuse some pets.
- Not transitioning: if your goal is outdoor training later, start the bridge early.
When paper training is a short-term plan, I recommend thinking ahead to your “next step.” For example, you can keep paper pads as a backup while you build a schedule for outdoor potty trips when the weather is bad.
Litter training: how to set up a litter box that actually works
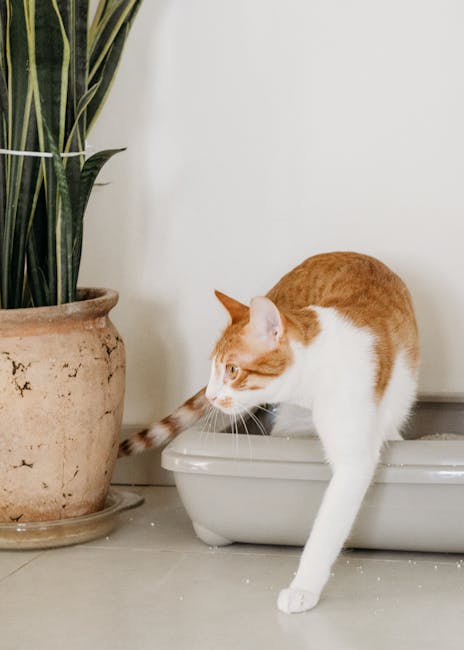
Litter training is mostly setup and cleanliness. If the box is wrong or dirty, your cat will tell you with a very clear message: “I’m not using this.”
Step 1: pick a box size and type for your cat
Start with a box that’s easy to enter and comfortable. For kittens, a low entry helps. For larger cats, a too-small box leads to awkward posture and missed digs.
Many households also do better with a second box in a different room. If your home has multiple floors, plan for that.
Step 2: use the right litter depth
Most cats prefer litter that’s deep enough to dig and cover. A good starting point is about 2 inches (about 5 cm). Too shallow feels wrong; too deep can track everywhere.
If you’re using clumping litter, keep the scoop routine consistent so it stays odor-free.
Step 3: keep a strict scoop schedule
As of 2026, the standard I recommend in real homes is scooping at least once per day, and ideally twice if your cat is picky or you have more than one cat.
Deep clean the box with mild soap and water on a regular basis. Avoid strong chemical cleaners that leave a smell behind.
Step 4: when accidents happen, fix the source
If your cat goes outside the box, don’t just clean. Look for what’s changed: moving the box, new litter scent, noisy location, new pet, or a health issue.
Urination outside the box can be stress, but it can also be pain. If it’s sudden, I treat it as a health clue first.
What most people get wrong with litter training
- Switching litter too fast: cats can be picky about texture and smell.
- One box per home, not per cat: a common rule is “one box per cat, plus one extra.”
- Ignoring location: a box near loud appliances can ruin the habit.
- Using deodorizers on urine: it can mask smells incorrectly or make the area smell “wrong” later.
If you’re also dealing with shedding or odor control around the home, you may want our guide to cleaning pet odors at home so your cleanup supports training instead of fighting it.
Crate training vs paper training vs litter training: which one should you choose?
Choose based on your pet’s natural behavior and your real schedule. Don’t choose based only on what’s easiest for you on day one.
Choose crate training if…
- You have a dog or puppy.
- You can take bathroom trips often enough during training.
- You want a clear routine and you’ll keep the crate positive.
Choose paper training if…
- You need an indoor potty spot as a short-term plan.
- Your pet can be supervised frequently during the day.
- You’re ready for lots of pad changes and careful cleanup.
Choose litter training if…
- You have a cat (or you’re working with a small animal that uses litter boxes).
- You can keep the box clean and placed in a calm spot.
- You’re willing to keep one litter type for at least a couple weeks.
People Also Ask: quick, direct answers
Is crate training better than paper training for puppies?
For dogs, crate training is usually cleaner and more reliable long-term. Paper training can work for short periods or for homes that can’t go outside often, but dogs typically learn outdoor habits faster with crate-based timing.
If you’re paper training because you can’t take breaks, consider a bridge plan: use paper as backup while you build a consistent outdoor schedule later.
Can I litter train a dog?
Some dogs can learn to use a litter box, but it’s not a common or best default. Dogs don’t naturally dig-and-bury like cats, and many dogs are more motivated by scent trails or chewable items. If you try it, you need supervision and training cues.
If your real goal is indoor potty, crate training or paper training will usually be more practical for dogs.
How long does potty training take with these methods?
Expect early wins in days, and full consistency in weeks. In my experience, crate training often shows fewer accidents in 3–10 days, but consistent “no mistakes” can take 4–8 weeks for many puppies. Litter training often looks good within 1–7 days if the setup is right. Paper training commonly takes 5–14 days to show clear spot choice, then more time to reduce accidents.
Age, past habits, and how quickly you correct mistakes all change the timeline.
Why does my pet go in the same spot even after I clean it?
Because the smell is still there. Regular household cleaners often hide odors instead of removing them from urine salts. Use an enzyme-based cleaner made for pet urine and follow label directions. Then block access to the area until the habit breaks.
I’ve seen people clean for days and still fail because they didn’t use an enzyme cleaner or they didn’t let the area dry completely.
What if my cat avoids the litter box suddenly?
Take it seriously as a health and stress signal. Sudden changes can point to urinary problems, pain, constipation, or anxiety. If it’s a new behavior, I’d call a vet promptly instead of just changing litter.
Many times, fixing the box helps, but health comes first when the change is fast.
Real-life scenarios: what I’d do in each home
This section is where people usually wish training advice included specifics. Here are a few “real week” scenarios I’ve run into.
Scenario 1: New puppy + busy work schedule
You’re coming home mid-day and you’re worried about accidents. My approach is crate training with a strict potty schedule, plus a safe pen/management setup while you’re gone.
In the first 2 weeks, plan on taking your puppy out immediately after waking, after meals, after play, and before you leave. If you can’t do that, paper training becomes a temporary backup option rather than a full replacement.
Scenario 2: Apartment living + small space
If you can’t easily go outside right away, paper training can be a practical bridge. I’d pick one pad type, place it in a corner protected by a baby gate, and keep your puppy in that area while you learn their timing.
Then, when you have the ability, transition to outdoor potty training by gradually moving the pad closer to a door and then switching to “go outside” only.
Scenario 3: Cat refuses the new litter
This happens constantly. My rule: if your cat is healthy and the litter box is clean, don’t rush to experiment with five new litters.
Instead, try mixing the new litter with the old one (small swaps over 3–7 days). Keep the box in the same calm spot. If your cat still refuses, look for health or stress triggers.
Costs and tools: what you’ll likely spend (rough 2026 estimates)
Training costs come from supplies and the time you spend cleaning. Here’s a realistic breakdown based on what I see families buy for typical setups.
- Crate training: $40–$150 for a crate, $10–$25 for a baby gate or pen panels, plus treats. You may also add a crate mat and a strong enzyme cleaner.
- Paper training: $15–$60 for initial pad supplies, washable mat kits can be $25–$80, plus a good cleaner and a trash/bin system.
- Litter training: litter can cost $10–$35 per month depending on type and litter usage. Add $15–$50 for a box, plus scoops and liners.
Hidden cost warning: if you don’t clean correctly, you’ll buy more supplies and still lose time. That’s why I’m so firm about enzyme cleaners for accidents.
Final takeaway: pick the method that matches your pet and your daily rhythm
Crate training vs. paper training vs. litter training isn’t about which is “best.” It’s about which system fits your pet’s needs and your ability to stay consistent.
If you have a dog, crate training gives you strong timing control and usually cleaner results. If you need an indoor plan short-term, paper training can work, but it demands frequent checks and spotless cleanup. If you have a cat, litter training is mostly about a correct box setup, calm placement, and daily scooping.
Your next step: choose your method, commit for at least 2 weeks, and clean mistakes with an enzyme cleaner. That combination is what turns “trying” into real progress.