
Hot pavement and winter salt aren’t just uncomfortable—they can literally injure your dog’s paw pads in a single walk. In 2026, I still see the same pattern: people notice limping too late, after the skin is already cracked or chemically burned. Paw care is easier than most owners think because you can prevent most damage with a few fast checks, smart timing, and the right protection.
In this guide, you’ll learn exactly how to protect pads from hot pavement, cold weather, and salt using practical tools you can buy or simple routines you can start today.
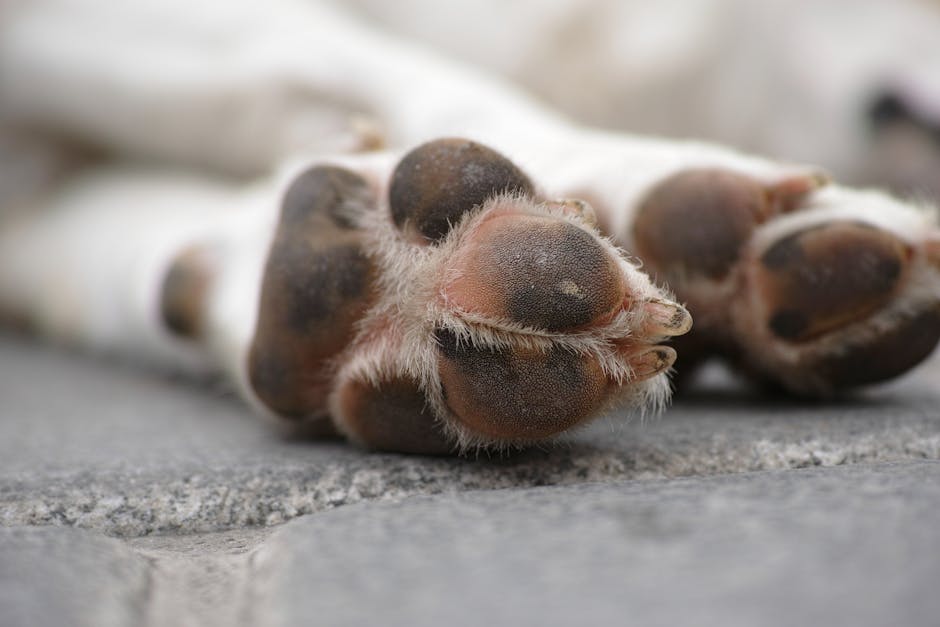
Paw Care Deep Dive: Why paw pads get hurt faster than you think
Paw pads are built for traction, but they’re not designed to handle extremes—especially heat, ice, and corrosive road chemicals. Paw pad injury is often a two-step process: the skin gets stressed first, then it breaks down (cracks, blisters, or inflammation) after friction and chemicals combine.
From my own routine walks (and the vet tech notes I’ve heard echoed by clinics), the “trigger” is usually one of these:
- Heat transfer: asphalt can be dramatically hotter than the air.
- Chilling + drying: cold wind pulls moisture out and reduces flexibility.
- Chemical burns: salt melts ice, but it also irritates skin and disrupts the paw’s natural barrier.
- Moisture trapped in fur: snowballs and damp fur hold chemicals against the skin.
Here’s a definition that helps: Paw pad protection refers to habits and products that reduce friction, heat/cold transfer, and chemical contact—so the skin stays intact and less reactive.
Hot pavement warning signs—and the “5-second rule” for protection
Hot pavement injuries can start with subtle behavior: your dog doesn’t always limp right away. The fastest way to prevent damage is to check the ground and adjust your route before you step out.
How hot is “too hot”? Use the 5-second ground test
This is the simplest featured-snippet method I trust: place the back of your hand on the surface. If you can’t hold it there for 5 seconds, it’s unsafe for paw pads.
Air temperature isn’t enough. In direct sun, blacktop can run far hotter than expected, and paw pads have less insulation than your shoes.
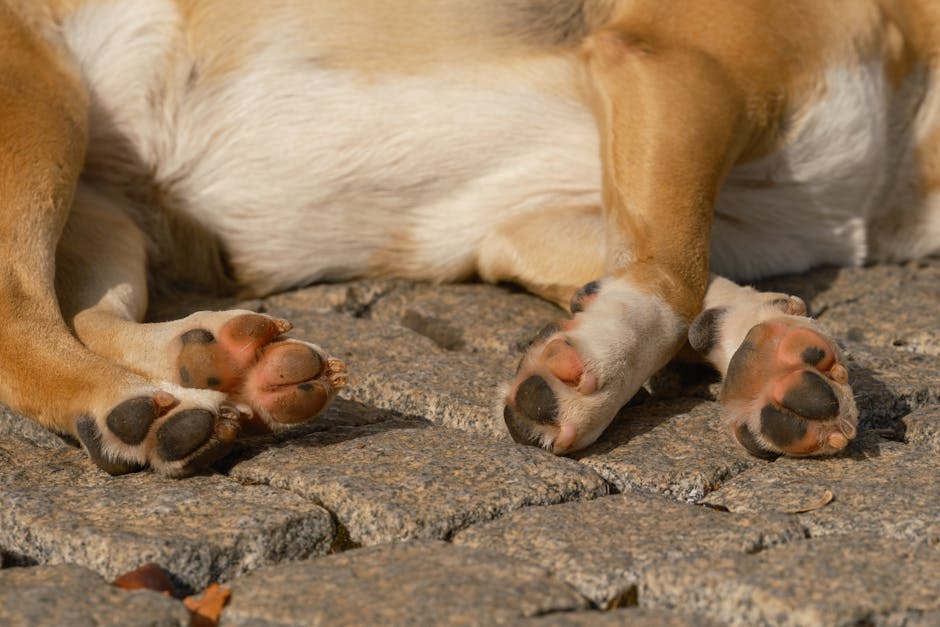
What hot pavement looks like later (and what most people get wrong)
Many owners think a quick walk is “fine” because the dog seemed okay in the moment. The problem is delayed skin breakdown—especially once the paw warms up and you return indoors, where cracks can become more noticeable.
Watch for:
- Pink or bright-red pads
- Shiny, dry surfaces
- Visible cracks or flaking skin
- Licking at the paws (often overlooked as “just grooming”)
- Short steps or a “tip-toe” gait
What people get wrong: they test only once. Pavement temperature changes with sun angle and shade. A route that’s safe in early morning can become a hazard by mid-day.
Step-by-step: a safer summer walking routine
- Walk timing first: choose early morning or evening when surfaces cool fast.
- Pick high-friction alternatives: aim for grass, dirt paths, or shaded routes where heat is less intense.
- Do a short preview: test your chosen path for 5 seconds in multiple spots—not just at the start.
- Protect with paw balm if your dog tolerates it.
- Use booties for repeated exposure: especially for puppies, senior dogs, or pets with a history of pad injuries.
My personal “rule of thumb” for product use: apply balm 15–20 minutes before stepping onto hot surfaces so it absorbs and doesn’t smear as quickly.
Booties vs paw balm vs paw wax: which works best for hot pavement
The right option depends on your dog’s lifestyle. I’ll be direct here: paw balm and wax help, but they’re not a full barrier in extreme heat. Booties provide the most physical protection, while balms focus on skin barrier support and friction reduction.
| Option | Best for | Pros | Limitations |
|---|---|---|---|
| Paw balm (moisturizing barrier) | Occasional hot walks, prevention | Easy to apply; supports barrier; can reduce minor irritation | Not a true heat shield; may wear off on long runs |
| Paw wax (more solid layer) | Moderate heat, short-to-medium walks | Stays on longer than many balms; stronger surface coverage | Can be messy; may need reapplication; booties still better for severe exposure |
| Dog paw booties | High-risk routes; repeated sun exposure; injured or sensitive paws | Physical barrier to asphalt; reduces chemical/road contact too | Requires training; can slip off if poorly fitted; not ideal for every dog |
If you’re building a routine, consider this combo approach: balm/wax for everyday barrier support and booties when the pavement is clearly unsafe or your dog is already reactive to heat.
When I’m training a dog who’s never worn booties, I also like to use treats and short indoor practice sessions before moving outside. If you want more on that, pair this with our training guide on teaching your dog to wear boots (same “confidence first” approach works for paw protection).
Cold weather paw pad protection: ice, snow, and the “salt-free” reality
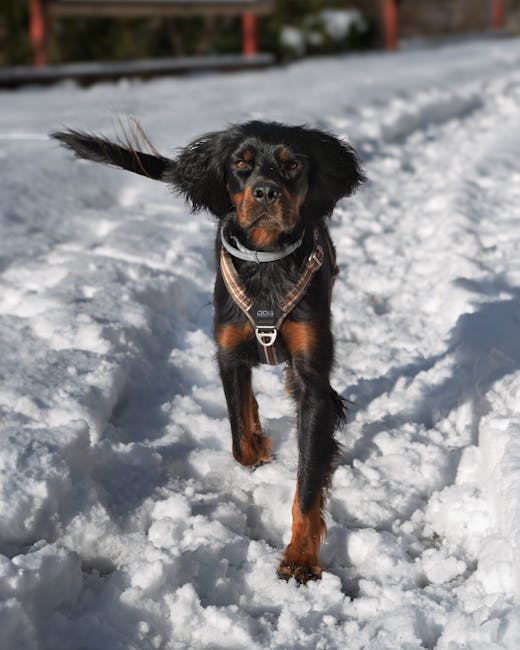
Cold weather doesn’t just chill paws—it changes the way skin behaves. Under ice and snow, paw pads can become vulnerable to cracks, and salt can turn moisture into a sticky irritant.
Check snow texture: packed snow is a hidden problem
Loose snow is inconvenient; packed snow and ice are harsher. They increase friction and can trap grit against the pad. If you see snow clumps forming between toes, that’s your cue to prevent buildup.
Why salt is different from simple “dirt”
Road salt is designed to lower the freezing point of water, but it also irritates skin and can cause ongoing dryness. I’ve seen paw redness persist for days after “just one snowy walk,” because the chemical residue keeps contact happening after you come inside.
A practical move: after winter walks, rinse paws with lukewarm water first, then dry thoroughly. Most owners skip the rinse and only wipe, leaving salt residue trapped in toe fur.
How to protect pads in winter: a reliable sequence
- Before you leave: check weather and route (sidewalks often have more salt than trails).
- Consider toe hair management: snowballs form when fur holds ice. If you struggle with it, a trim can help (don’t shave too short).
- Use booties on salted sidewalks: this is where booties outperform balm. Salt exposure is frequent and you can’t time it perfectly.
- Walk shorter, more intentional routes: fewer “chemical contacts” add up.
- Rinse and dry immediately: lukewarm water, then a towel + air-dry or gentle fan drying.
- Apply a winter-safe balm: look for ingredients that support barrier moisture without being overly greasy.
Important limitation: if your dog has open sores or deep cracks, balm isn’t enough. In that case, treat it like an injury—rinse gently, keep it clean, and contact your vet.
Salt and de-icers: prevention tips that actually reduce irritation
People think de-icer prevention means “avoid salt.” Real life doesn’t work like that—roads and sidewalks are treated in many neighborhoods. So the goal becomes reducing contact time and removing residue quickly.
Rinse, don’t just wipe
A quick wipe with a damp cloth often leaves chemical residue behind, especially between toes. If you only have time for one winter paw step, make it the rinse + dry sequence.
Choose a “home paw station” setup
This is one of my favorite home lifestyle hacks because it removes friction from the routine. Set up a dedicated spot near the door with a towel, lukewarm water in a small bin, a soft cloth for toe areas, and a pet-safe paw balm for after drying.
Costs are low and consistent behavior improves injury prevention. In 2026, a simple “paw station” is one of the most effective anti-salt strategies I recommend because it makes the right step automatic.
How to handle residue on booties too
Booties don’t eliminate salt issues; they shift them to the shoe surface. After walks, wipe and rinse booties if possible, dry fully, and store them somewhere clean so residue doesn’t transfer back next time.
Original insight: the “pH + friction” combo that drives pad damage
Here’s the angle most generic paw guides miss: paw injuries often come from both chemical irritation (salt/detergents) and friction (rough surfaces + moisture). When you combine those two, you get faster barrier breakdown.
In real-world terms, that means two dogs can walk the same route—one on a dry day, one right after a melt/refreeze cycle. The dog walking during wet chemical exposure often has more redness even if the route distance is similar.
So when choosing prevention, aim for a “two-factor” plan:
- Reduce chemical contact (booties, rinse routine)
- Reduce friction (balm/wax barrier, appropriate surface choice)
If you do only one (like applying balm but never rinsing), you’re fighting with one hand tied behind your back in winter.
When to stop home care and call your vet
Most minor irritation improves with cleaning and time, but some signs mean you need professional care. I recommend treating the paw like skin that can be infected if cracks let bacteria in.
Call your vet if you notice these signs
- Severe swelling or heat in the pad
- Blisters, open sores, or bleeding cracks
- Pus, foul odor, or worsening redness after 24–48 hours
- Reluctance to bear weight or progressive limping
- Hair loss around the toes or persistent licking despite rinsing
If your dog is diabetic, immunocompromised, or older with reduced tissue healing, be more conservative and contact your vet sooner.
People Also Ask: Paw Care Deep Dive questions
How do I know if my dog burned their paws on hot pavement?
Look for redness, heat, and changes in gait. If your dog starts tip-toeing, licking the paws, or showing bright pink/red pads after a hot walk, hot pavement injury is likely.
Do a gentle check once indoors with good lighting. If you see blisters, cracks, or your dog is painful to touch, contact your vet rather than trying to “wait it out.”
Should I use paw balm or booties in winter?
If the ground is salted or icy, booties usually provide better protection than balm alone. Balm is helpful for barrier support and dryness, but it doesn’t fully stop chemical residue from contacting the skin.
For snowy, salted areas, my practical recommendation is: booties on the route, balm after you rinse and dry. That combo targets the two biggest drivers—chemical contact and friction.
Can salt cause permanent paw damage?
Salt can cause repeated irritation and cracking, and that can become chronic if it’s not managed. Permanent damage is uncommon, but persistent fissures and secondary infections can lead to long-term discomfort.
In real life, the risk rises when owners wipe paws only and don’t fully remove residue between toes.
What’s the safest way to clean my dog’s paws after walks?
Rinse with lukewarm water first, then dry thoroughly. Wiping is okay for quick cleanup, but in 2026 best practice for winter is rinse + dry to reduce ongoing salt contact.
If your dog has sensitive skin, avoid hot water and harsh soaps. Plain water is usually enough for routine residue removal.
Does grass feel safer than concrete for paw pads?
Often yes—grass is generally cooler and gentler on skin. But remember: grass can still be hot in midday sun, and it can hold moisture that becomes slippery or icy.
Use the 5-second ground test on whatever surface you plan to walk on, not just “grass vs pavement.”
Quick “Paw Protection” checklist for hot, cold, and salted days
Use this as a before-you-leave decision guide. It’s fast enough to do consistently, which is what actually prevents injuries.
- Hot pavement: 5-second ground test, choose shade/grass, apply balm/wax 15–20 minutes before, booties for high-risk routes.
- Cold + snow: manage snow packing between toes, shorten salted routes, booties on treated sidewalks, rinse + dry immediately after.
- Salt residue: rinse first, dry fully, balm after drying, wash/wipe booties too.
Related home and pet care steps you can pair with paw protection
Paw care works best when your broader routine supports skin health and comfort. If you’re also thinking about training and home safety, you may like these related posts from our Pet Care and Animal Health cluster:
- how to clean your dog’s paws safely (great for rinse-and-dry habits)
- signs your dog has skin irritation (helps you distinguish mild dryness from infection risk)
- building confidence for new gear (perfect for bootie training)
Conclusion: Protect pads from hot, cold, and salt with a two-part routine
If you only remember one thing, make it this: paw pad protection is about reducing heat/cold transfer and limiting chemical contact—then removing residue quickly. Use the 5-second ground test for hot pavement, choose booties when salt and ice are in play, and rinse + dry after winter walks.
Start today by setting up a simple paw station at your entryway and adding a consistent before-walk check. Those two habits prevent the majority of pad problems I see—before your dog has to suffer through cracked, burning skin.
Featured image alt text suggestion (use on your site): Paw care deep dive: dog pads protected from hot pavement and cold salt with booties and balm